Showing posts with label House-Remodel. Show all posts

Friday, May 10, 2013

Tokonoma - built-in display shelf.

家に床の間ができました。


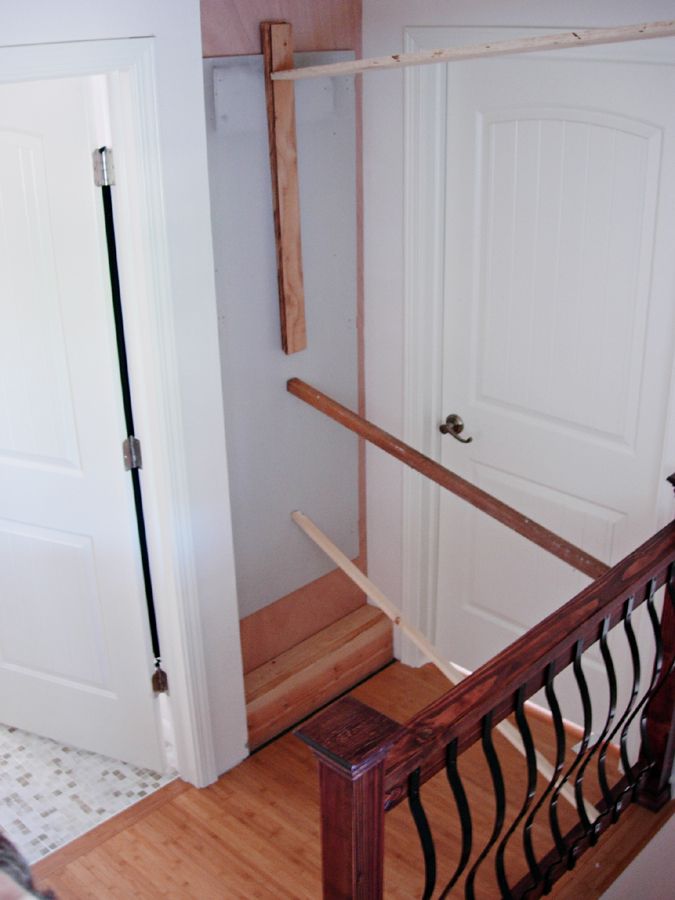
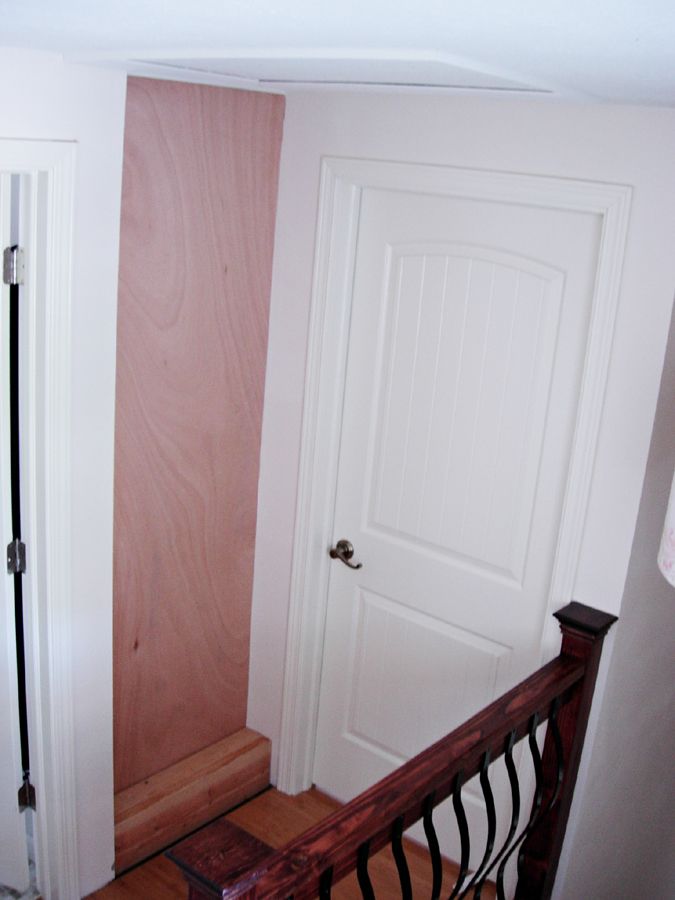
Finally, after five years of looking at the asphalt paper on the floor, we finished this little space.  Our architect made this shelving space, but it's too skinny to put anything.  I would have preferred making the bathroom bigger.  

階段をあがった所にあるこのスペース。
設計士のこだわりだったみたいなんですけど、私としてはその分向こう側のバスルームを広くして欲しかったな。設計士の予定では、本棚???どうして、ここに?なんですけど・・・。


While my kids and I were in Japan last summer, my husband finally tackled this project.  These photos are taken by him.  It's a different view, and it feels weird...He is tall!

去年の夏休み、私達が日本に行っている間に工事をしてもらいました。
(夫が撮った写真。私と違う景色。背、高いな。)

One.

Two.

Three.


Four!

Well, I came home with cancer...so, we couldn't proceed anymore.  Our original plan was to put glass shelves, and I was going to stain the wood the same color as stair railing.  

本当は、2段くらいガラスの棚を入れて飾り棚にする予定だったんですけど、私が病気になってしまったので、工事は中断。

でも、ある日、急に床の間に変身していたんです。私の母の仕業でした。アマリが夏休みの日本画教室で書いた花火の掛け軸がいい感じ^^


がん治療が終わって、やっと木を染めました。
ずっと階段の手すりと同じマホガニーに染めようと思っていたのに、いざ決心したのは白。


After looking at the wood wall for several months, I decided to stain it white.  
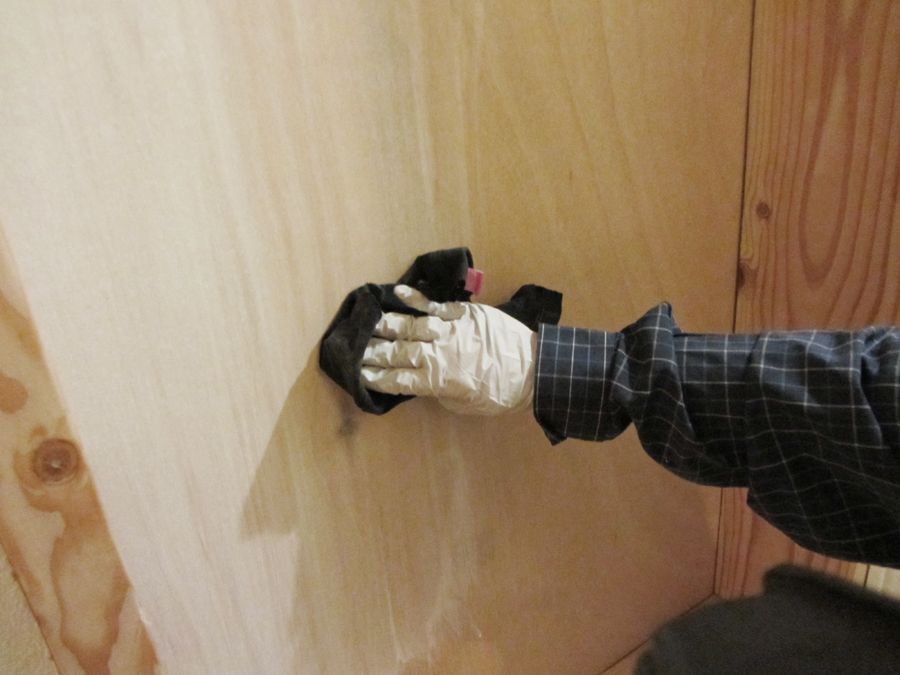
First, I painted it with the mixture of white paint and water, then I wiped it off with an old T-shirt.   I repeated this three or four times.  Each time, I wait until it gets completely dry.

白いペンキを水で薄めて塗ってから、不要なTシャツなどでふき取っていきます。ムラができないようにしながら、乾いては塗ってふき取って、3回か4回繰り返しました。


All done!  Yeah, white is better.  It adds much more space, I feel.

やっと、完成。
白い方が広く見えますね。


Tuesday, February 05, 2013

Old and new coat hanger need to be stained.

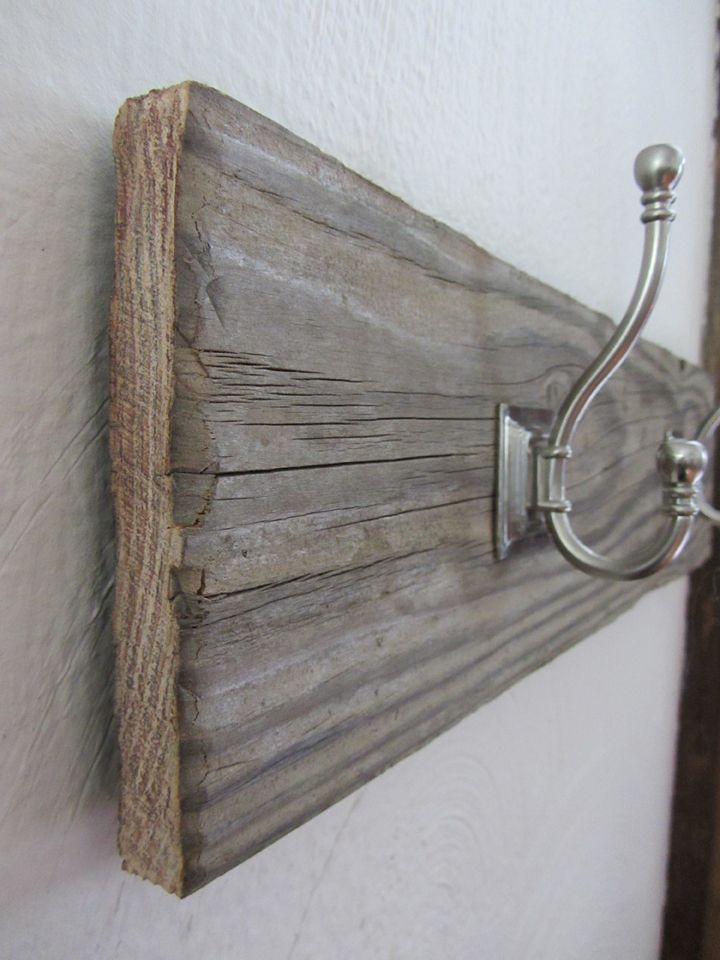
These recently installed coat hooks (link is here), looked a bit too dark, and a bit of a different brown color than the wooden column and furniture around them.  I wanted more older grey looking.

つい最近、作って取り付けたコートフック(リンクはここ)、やっぱり少し濃いんです。隣の柱とも微妙に違う茶色だし、もうちょっと薄いグレーにならないかな。


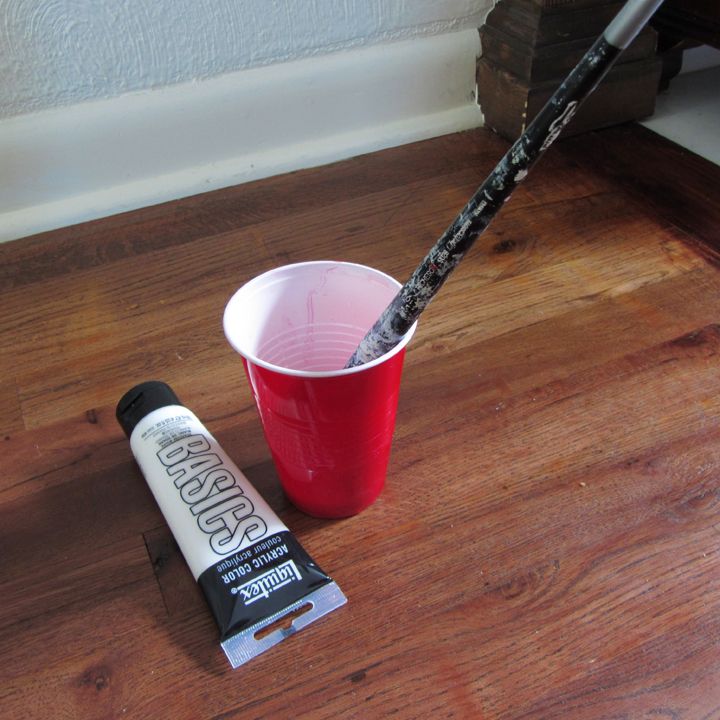
So, while I was waiting for a kettle of water to boil, I stained them white.  I made the stain with leftover acrylic paint and water.  When I was in college, I used this technique a lot for staining wood to any color I wanted.

やかんのお湯が沸くのを待っている間に、ささっと塗りました。水に溶いたアクリル絵の具で。これ、美学生だった頃によく使った手段です。木目を残しつつ、綺麗に木が染まります。


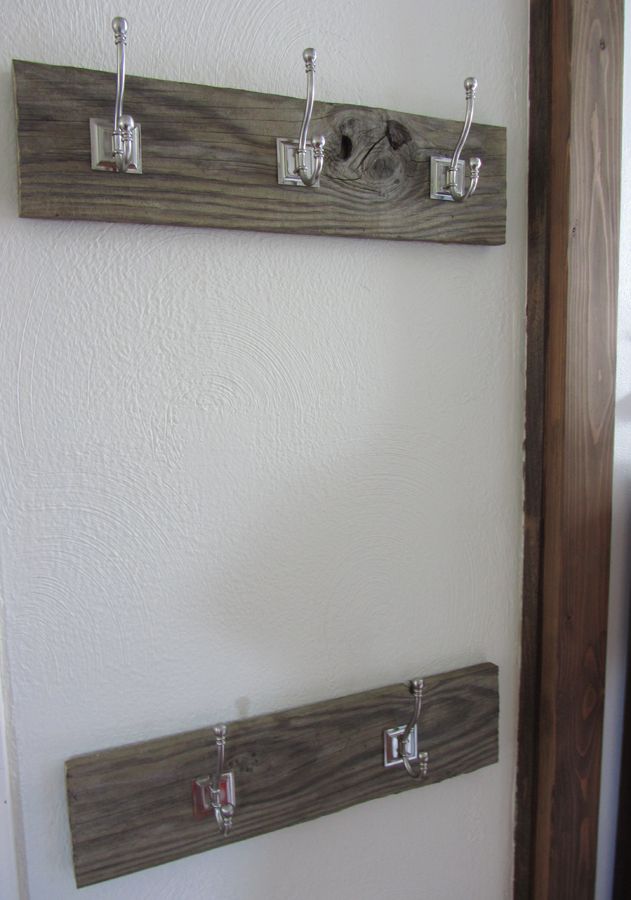
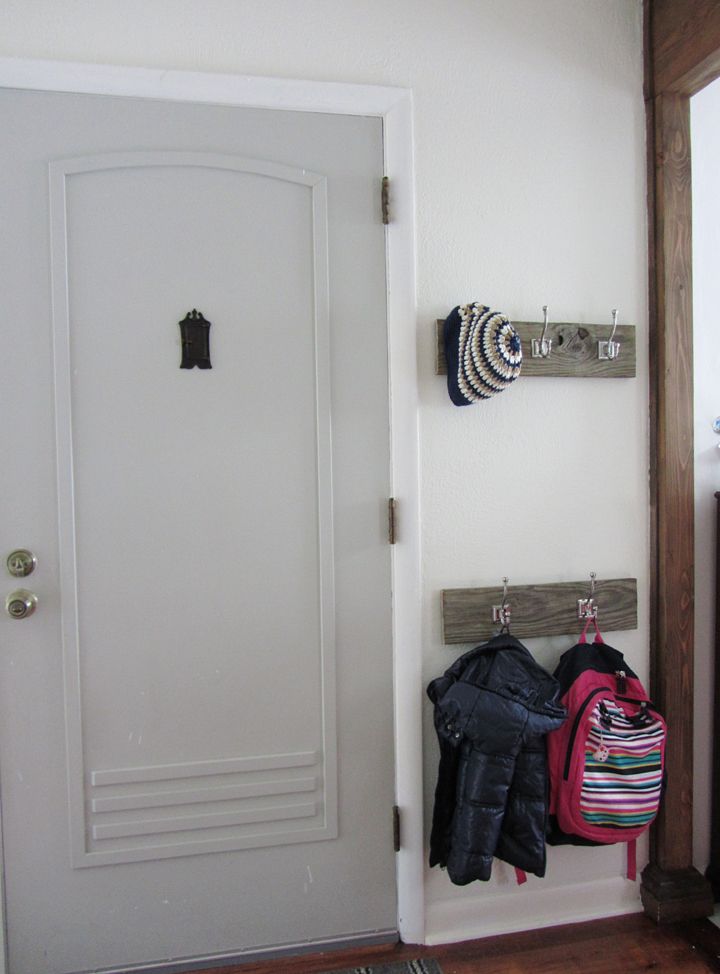
The bottom one is stained.  The upper one is not.

上がビフォー。下がアフター。


Amazingly fast and quick fix.  And, it's much better.   I love the gray.

本当にあっという間に塗り終わります。古い質感はそのまま、グレーになってくれました。うん、いい感じ!


Wednesday, January 16, 2013

Old and new coat hanger.

コートフックの金具を探していたら、隣の棚に無造作に置かれた元ディスプレイのこれ。なんと$28.97が$7.72に。ラッキーな私達。買うしかないです。でも、そのまま使うには少し大きすぎ。

We were looking for coat hooks at the hardware store, then on the next shelf, here this hanger was on clearance.  It was a display, but it came down from $28.97 to $7.72.  It was way cheaper buying this with five hooks than it was to buy each individual hook.   If we were luckier, it would have fit in this space by the door, but too bad, it was too long.


この汚い板を使います。庭の片隅に放置されっぱなしの泥だらけの板。リンゴの木にあったツリーハウスに使われていたので、ヒノキだと思われます。

Originally, I wanted something old looking anyway.  For the material,  this ex-tree house cedar which has been standing against our apple tree for 10 years was nominated.  Good, dirty enough.


面倒がる夫に頼み込んで、やっとできました。切り口はかなづちでたたいたりして丸っこくしたんだけど、どうしても色が新鮮すぎます。色鉛筆で塗ってしまいました。

Well, it had to get dried and cleaned first.  And, it took weeks to convince my husband to work on something I want, but he doesn't.  Once he started working, of course, he had to be a perfectionist.  After he cut them to size, and pounded the edges, they still looked too new, so I colored them.  


この通り。でも、やっぱり、絵の具の方が良かったかな。

Maybe, watercolors are better?


うん。いい感じ。家族にはコートクローゼットがあるので、これはお客さん用。特に子供たちのお客さん達。これで忘れ物が防げそうです。普段は空っぽですけど、はいパチリ。

Good.  For us, we actually have a coat closet, so these are for guests, especially our precious little guests who takes their coats, socks, and shirts off while they play wildly.  I love it!


Thursday, May 24, 2012

New dishwasher, yay!

The one last appliance that came with this house is leaving.  It's still working, but I always felt gross using an old dishwasher used by the previous homeowner, who happened to never clean anything.  Well, I'm germ-phobic, so don't mind me.  Anyway, the old model was made in 1991.  After 21 years, it might break anytime, and we got a great deal with GE appliances, so it's time to go.

21年前の食器洗浄機を取り替えました。まだ十分使えるのですが、いつ壊れるか分からないし、元家主の不潔さを目の当たりにして(何度も書いているかもしれませんが)、どれだけ消毒してもどうしても気持ち悪かったので、私としては嬉しい決断。神経質なのは治りませんね。


I always thought I wanted stainless steel both inside and out.  But with our new kitchen, black goes better.

買う前は外も内も絶対ステンレスと思っていたのに、キッチンがこげ茶なので黒に決定。内側も、ステンレスだと容量が少なくなってしまうらしいので、断念。確かにこれ、今までの1.5倍は入るかも。


It's Energy Star.  I don't know how much of a savings we get, but it's got to be better than a 21 year old dishwasher, right?

毎月多額の光熱費も少しは節約できるはず。


For an entire hour, the kids were staring at the initial test operation, sitting on the cold tile floor.
By the way, if you are planning on replacing your dishwasher, chose the tall tub option.  It fits a lot more dishes. 

普通のサイクルが一時間。その間、ずーっとパネルを見つめる子供達。センサーが作動して、残り時間が変動するのがおもしろいらしい。気が長いな・・・。

Sunday, April 29, 2012

Bay window bench.

This house was built in 1952 with just one bedroom and a kitchen, then the previous owner added 2 bedrooms in the back of the house, and we added a second floor with another 3 bedrooms, 1 bathroom and a garage.  The original bedroom and living room became our living and dining room.  One thing we still can't figure out is what to do with this small skinny room.  Where should the couch and chairs go, where can we possibly have a full dining area?  For nine years, we struggled moving our furniture around, sit and stood and thought about it, and we came up this small solution.  Make the bay window into another seating area, and get rid of one of the sofas. 

1952年築の我が家。最初は、隣の家の離れとして、寝室が一つしかないちっぽけな家でした。その後、次のオーナーが寝室を2つ増築して、私達が9年前に引っ越してきてから、ガレージと2階に寝室3つとバスルームを増築しました。そして、私達が9年間頭を悩ませているのは、その間取り。リビングとキッチンの壁を取り払った事によって少しは大きく感じるものの、小さくて細長いこのリビングのどこに家具をどう配置したらいいのか、動かしては考えて、立って眺めては考えて、座っては考えて、とりあえずの結論が、出窓をベンチにして、ソファーをひとつなくそう、というプロジェクト。


Now, it begins.  No more going back.

ビフォー。

There was a quite a lot of storage under there.  The lid is gone.

出窓は開くようになっていて、ちょっとした物入れでした。

とりあえず壁を切ってみると、この出窓も後に取り付けた事が判明。切ろうとしている壁は元外壁。
 

Uh, oh.  The wiring needs to be redone.  Back when someone else before us added this bay window, there must not have been a city inspection.

この配線危なくないかい?蓋をあけて良かったー。配線はやり直し。ライアン君、こういう事がささっと出来るようになって便利な夫です。ついでに、向こう側の壁にもコンセントを取り付けてもらった。

With crazy dust and the noise of power tools, the bay window is lowered.

爆音と粉塵と共に、壁を切断。


Rebuilt.  The back wall is covered with wainscoting. 

新しい木材を使って作り直しです。蓋はそのまま使用。窓とベンチの間のむき出しの板はベニヤで覆いました。


Add some trim. This step needs to be done as perfect as possible.  I think if the frames look great, everything looks clean. 

淵を取り付けます。この工程、結構肝心。ここで完璧に仕上げておくと、仕上がりがとても綺麗です。というか、素人ならではの上手に出来なかった部分をカバーできるステップなのかな。

All gaps and nail holes need to be filled with wood putty.  I use a painter's knife to do this job.  After it is dry, I use a wet microfiber cloth to clean up.

ほんの少しのギャップも釘の穴も、ウッドパティで埋めます。私は油絵を描くときのナイフを使用。乾いたら、マイクロファイバーの布を固く絞ってそっと拭きます。紙やすりより綺麗に仕上がります。

Finally, paint job.  I used an acrylic semi-gloss ivory. 

ペンキ塗り。アクリルのセミグロスで。アイボリーにしました。


Not bad is it?
I'll make seat cushions for it.
アフター。
悪くないでしょ。部屋が広くなったー。
ソファ代わりになるように、クッションを作らなきゃ。

Wednesday, April 04, 2012

DIY Patio vol.3 -Concrete edges. Hardscape!

Okay.  It took forever, but I am finally recovered from being sick.  I can finish this series focused on the patio.
So, here is the final step of finishing up the patio. Pavers need to be secured in place by either metal or concrete.  I've seen driveways with metal edges, and over the years, it looks wavy and loose, so we chose concrete.  Once you mix concrete, it won't wait.  So, this work needs to be done in one day, for us, with kids...it was hard!!!

体力も回復してきたので、一気にいきますよー。
本来敷石は鉄やコンクリート等のがっちりした囲いの中に石を切っては並べます。私達は順序逆で敷石の外側にコンクリートで囲いを作りました。以前、鉄板で囲ってあるドライブウェイを見た事があるのですが、時と共に崩れてしまっていたので、コンクリートで作っていきます。

コンクリートは混ぜ始めたら止まれないので、流して整形、までが一日のお仕事。ランチやおやつを用意して、子供達を遊ばせながら、コンクリートを混ぜては流して、オムツも替えたり・・・激しいとしか言いようのない重労働でした。(作業は去年の秋です。まさか肺炎明けで、こんな事はしないのでご安心を。)

1. Build a good outer form to hold in the outside edges of the concrete.
コンクリートの外側になる方に型を作り、しっかりと支えます。
2. Take the wooden form off the finished pavers very carefully.
    After removing the wooden form, we still wanted to hold the pavers in place while the concrete was setting, so we used cardboard.
内側(敷石の縁)の型は、慎重に外して、コンクリートが飛び散らないようにダンボールで囲います。

3. Mix, pour, Mix and pour.  We used 28bags of 80lb concrete.
混ぜては流して、混ぜては流す。36.2kgのコンクリートを28袋。
持ち上げるのは、全部ライアン。力持ちだな。ご苦労!!!
 

4. Make sure there are no air holes.
空気穴ができないように、しっかりと均します。

5. When the concrete is pushed in place, I poured a little charcoal concrete dye on top, then smoothed it out randomly.
平らになったところで、チャコールグレーの染め材を垂らしながら、更に綺麗に均します。
色的にはべた塗りにならないように、適当に。


My goal here was to make it look like these dark stones in this Japanese pathway.
私のイメージはこれ。古都の石畳風。

image:http://wallpaper.free-photograph.net/jp/photobase/yp3535.html
6. Wait a little while for it to harden.  Then, make lines.
少し固まってきたところで、線を入れます。

7. Do they start to look like stones?
石畳に近づいてきたかな。

8. When it's almost hard, polish the concrete with metal knife.  It adds a more stone-like feel.
固まる寸前ぎりぎりのところで、左官用のナイフを押し付けてスムーズにします。表現が難しいけど、磨く感じかな。表面にかすかに模様ができて、つやもでて、石っぽくなります。

Add a little personal touch:)
せっかくの手作り。落書きも忘れずに。


9. Cover it with plastic overnight to cure.
一晩何があるか分からないので、カバーをかけておきます。
 

10. When it's dry (we waited two days, since it was late October in Oregon), take off the forms.  We tapped them a little, but they should come out pretty easy.
乾いたら(ここオレゴンの10月下旬で2日間)、型を外します。


11. Fill the gaps in between pavers with polymeric sand to lock all the joints.
敷石専用の砂(確か円錐形だったと思う。)を敷きます。専用の砂だと、敷居が動かない様に固定できます。
12. After that, use a tamper one last time.  It rained here afterwards, but you can use a garden hose with a  shower head to water it down.  The sand will sink down, so you'll need to apply more sand when it's dry.  Repeat until it stops going down.
タンパーで、平らに均等になるように押し固めます。
その後、ホースで水をかけて砂を押しつかせます。また、砂が沈むので、乾いたら砂を敷きます。


13. I still need to apply mortar on the exposed side of the concrete border to make it look like flat stones, but it was too late in the season.  In early summer, I'll come back to work on it. However, the work is done for the most part.  Our new patio!
側面をモルタルで仕上げる作業が残ってますが、初冬、雨やら霜やらが降ってきたので、一旦、作業中断。初夏になったら、お仕事再開しよう。サッシのドアからパティオをつなぐデッキも作らなきゃ。
とりあえず、パティオはでっきあがりー!  


*We don't have any tools for working concrete.  What you see here may not be the right way or method.  This is just my DIY diary.
*コンクリート専用の工具は一切持っていないので、使っている道具は左官用の物だったり、タイル張りの物だったりします。私のお楽しみDIYなので、間違っている事もたくさんあると思います。ご了承願いまーす。